- Get link
- X
- Other Apps
 |
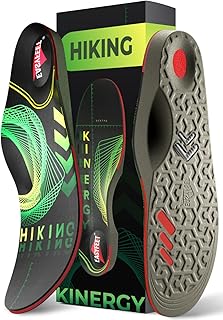
| Best hiking insole |
When you’re out exploring rugged trails, the last thing you want is sore feet slowing you down. Blisters, heel pain, or tired arches can quickly turn an exciting hike into a painful memory. This is where hiking insoles come in—small but mighty gear that can make a world of difference in your comfort and performance.
Whether you’re a weekend hiker or a seasoned backpacker, investing in the right pair of insoles can transform your hiking experience. Think of them as your personal trail bodyguards—protecting your feet from shock, stabilizing your steps, and helping you go that extra mile without discomfort.
Why Hiking Insoles Matter
You might be wondering, “Aren’t the insoles that come with my boots enough?” The short answer: usually not. Most hiking boots come with basic, flat inserts that don’t provide the level of support you need for hours of trekking.
Here’s what hiking insoles can do for you:
-
Reduce Foot Fatigue: Added cushioning absorbs shock with each step.
-
Improve Alignment: Keeps your feet and ankles in a natural position.
-
Prevent Blisters & Hotspots: Proper fit reduces unnecessary rubbing.
-
Support Arches: Whether you have flat feet, high arches, or neutral arches.
-
Enhance Comfort: Because let’s face it, happy feet = happy hiker.
Types of Hiking Insoles
Not all insoles are created equal. Choosing the right type depends on yours foot shape and hiking tyle:
1. Cushioned Insoles
Perfect if you crave softness and comfort underfoot. Great for casual hikers or those with sensitive feet.
2. Supportive Insoles
These focus on stability and arch support—ideal if you struggle with overpronation or flat feet.
3. Heat-Moldable Insoles
Customizable for your unique foot shape. Heat them up, mold them, and enjoy a personalized fit.
4. Gel Insoles
Best for shock absorption, especially helpful on rocky terrain.
How to Choose the Right Hiking Insoles
Here are some practical tips for picking insoles that suit you best:
-
Know Your Arch Type: Flat, medium, or high arches require different support.
-
Match Insole to Terrain: Steep, rocky hikes may need extra cushioning.
-
Check Boot Fit: Insoles should complement, not overcrowd, your boots.
-
Think About Duration: Longer hikes demand more support and shock absorption.
👉 Pro tip: Always try your insoles with your actual hiking socks before hitting the trail. A small mismatch can lead to big problems.
Best Practices for Using Hiking Insoles
-
Break Them In: Just like hiking boots, insoles need a little time to adapt to your feet.
-
Replace Regularly: A worn-out insole loses its magic. Swap them every 6–12 months depending on usage.
-
Keep Them Clean: Remove after hikes, let them air out, and wash occasionally.
-
Consider Multiple Pairs: If you hike in different terrains, rotating insoles can help.
Final Thoughts
Hiking insoles may seem like a small investment, but they can have a massive impact on your outdoor adventures. By reducing fatigue, preventing blisters, and offering much-needed support, they allow you to enjoy the journey instead of worrying about sore feet.
Remember, the best gear doesn’t always have to be flashy—it just has to work. And trust me, your feet will thank you for giving them the comfort they deserve.
So before your next hike, slip a pair of quality hiking insoles into your boots. You might just find that the trail feels a whole lot shorter, and the views a whole lot sweeter.
Comments
Post a Comment